How to Choose the Best Biker Patches for Your Brand?

Choosing the right Biker Patches is not only a branding decision. It is a test of how well your design survives real use.

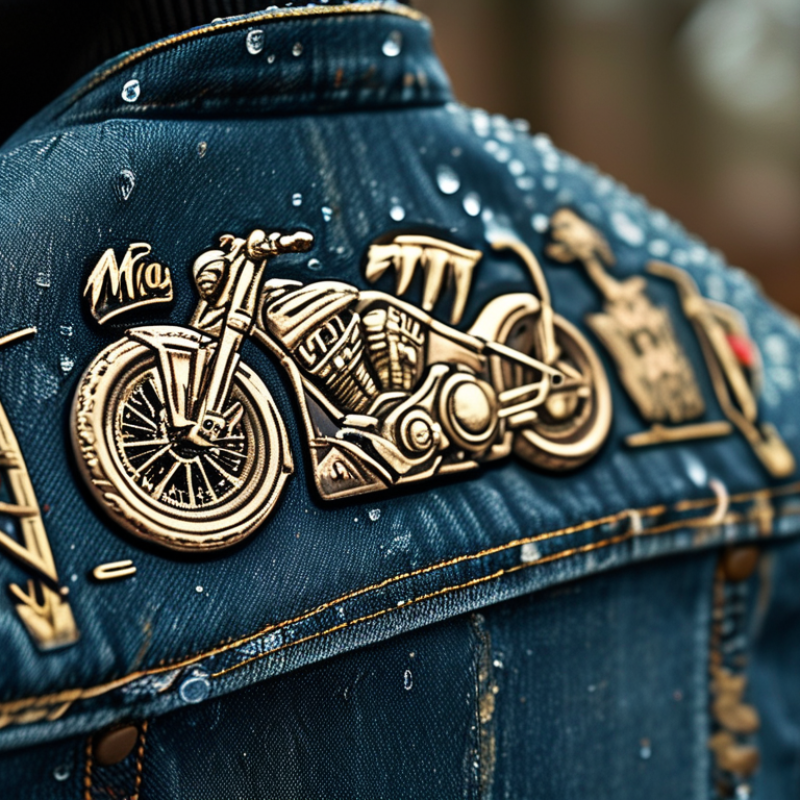
Mia Carter, a Biker Patches production consultant, says, “A strong patch must look memorable before it proves durable.” That principle matters. A patch may appear impressive on a bright screen, yet lose clarity on a dark denim vest. Check the artwork at actual size. Fine lettering often disappears. Thick borders usually remain readable. Thread color also deserves attention. Black, cream, muted red, and metallic gold create different moods. Choose shades that match your brand, not only current trends.

Think about the wearer’s routine. Will the patch face sunlight, rain, dust, or repeated washing? Embroidered Biker Patches offer texture and a traditional appearance. Woven patches can show smaller details more clearly. PVC options resist moisture, but they may feel less classic. Decide between sew-on and hook-and-loop backing according to how customers use the product. Placement matters too. A chest patch needs a compact shape. A large back design can carry stronger visual storytelling.

Do not overdesign it.

A crowded patch may communicate nothing. Test one sample on the intended garment before ordering in bulk. Photograph it from several distances. Ask someone unfamiliar with the brand what they notice. Their answer may expose a weakness you missed. I have learned that perfection on paper can become awkward in production. Small adjustments often improve readability, comfort, and long-term recognition. The best choice balances identity, craftsmanship, durability, and honest customer experience.
How to Choose the Best Biker Patches for Your Brand?

Define Brand Goals Using the 4 Core Biker Patch Design Variables

How to Choose the Best Biker Patches for Your Brand?

A strong biker patch begins with a clear brand goal. Decide whether the patch should build recognition, show membership, or communicate a campaign message. Keep one main idea visible. Too many symbols can weaken the design.

The first variable is the message. Use short wording that remains readable from several feet away. The second is shape and size. A back patch can carry more detail, while a small chest patch needs simpler artwork. Measure the garment area before approving the design. I once saw a detailed emblem lose its impact because the lettering became too small.

Color is the third variable. Choose a controlled palette with enough contrast between thread and background. Dark fabric may need lighter borders or brighter stitching. Test the colors under indoor and outdoor light. Screens can be misleading. The fourth variable is construction, including material, stitch density, backing, and edge finishing. Embroidery adds texture, while woven patches suit fine lines and smaller text. A durable border helps prevent fraying during regular wear.

Request a physical sample before placing a larger order. Check the edges, attachment method, thread tension, and wash response. Minor flaws often appear only on the sample. That is useful feedback, not wasted effort. Reconsider designs that look impressive digitally but feel crowded in hand. A practical patch should remain legible, comfortable, and consistent with the garment’s purpose.


Choose Patch Size and Stitch Density for 3–6 mm Lettering Legibility

Choosing the best biker patch begins with lettering that remains readable at riding distance.

For 3–6 mm lettering, select a simple, bold typeface with open counters. Keep strong contrast between thread and twill. A 3 mm letter needs more care than a 6 mm letter.

Use a patch width of at least 75 mm when several words must fit. For short names, 50–65 mm may work, but test the actual size first.

Professional digitizing practice often starts near 0.40–0.45 mm stitch spacing for satin lettering. Reduce density on lightweight fabric, or the patch may become stiff and puckered.

Dense stitches can look impressive. They can also close small letter openings.

A 2024 Textile Exchange Materials Market Report recorded approximately 124 million tonnes of global fiber production in 2023. The figure reinforces the value of durable, repairable decoration.

UNEP reports that about 92 million tonnes of textile waste are generated annually. A well-tested patch should survive washing, abrasion, and repeated flexing, rather than becoming disposable artwork.

3 mm
4.5 mm
6 mm

My sampling experience suggests testing three versions: 3 mm, 4.5 mm, and 6 mm lettering. Inspect them under indoor light and from two metres away.

The smallest sample may fail. That is useful evidence, not wasted material. Check the lettering after backing removal, because the fabric can relax and slightly distort the shapes.

Perfect density on screen is not always perfect density on cloth.

Compare Embroidery, Woven, PVC, and Leather by 5 Performance Metrics

Choosing the best biker patches for your brand requires more than matching colors.

I compare four materials through five performance metrics:

durability weather resistance visual detail wearer comfort maintenance cost

Embroidered patches create a raised, traditional texture and suit bold lettering. Dense stitching can resist abrasion, but loose threads may catch on jackets.

Woven patches show finer details and smaller text. They feel lighter, though their flat surface can look less dramatic from a distance.

PVC patches handle rain, mud, and frequent cleaning well. Their flexible rubber-like finish stays sharp, but extreme heat may cause warping.

Leather offers a premium, tactile appearance that improves with age. However, moisture and poor storage can darken or stiffen it.

For outdoor riding, PVC usually wins weather resistance and maintenance. Embroidery often provides the strongest visual character. Woven construction works better for detailed symbols, while leather adds weight and heritage appeal.

Comfort depends on the backing, not only the face material. A rough border can irritate a shoulder after hours of movement.

I once favored heavy embroidery for its appearance, then noticed thread wear around high-friction seams. That result changed my recommendation.

No material wins every metric.

Test a sample on the actual garment, expose it to rain, and inspect edges after repeated cleaning.

Small lettering still needs careful review. Quality can vary between batches.

Verify Colorfastness Against ISO 105-C06 and Abrasion Resistance Standards

How to Choose the Best Biker Patches for Your Brand?

A biker patch must look strong after real use, not only in a product photo. Start by requesting colorfastness results against ISO 105-C06, which evaluates color change and staining after laundering. Ask which test method, temperature, detergent, and cycle were used. These details affect the result. A passing report without test conditions is incomplete evidence.

Abrasion resistance matters when patches rub against jackets, denim, bags, or motorcycle seats. Request testing against a suitable abrasion standard, such as ISO 12947, and confirm the applied fabric was tested. Loose embroidery can perform differently from a finished patch. Check thread tension, edge stitching, backing adhesion, and surface damage after repeated rubbing. I once trusted a bright sample too quickly. Its colors faded after several washes. That mistake changed my inspection process.

Tips: Wash a production sample, not just a showroom sample. Compare it under natural daylight. Photograph the patch before and after testing. Keep batch records, because thread lots can vary. Ask for retesting when materials change. Small defects matter. A responsible supplier should explain weak results instead of hiding them. Also check whether the selected standard matches the patch’s actual use. ISO testing adds confidence, but field conditions remain unpredictable. Perhaps a tougher internal test is worthwhile.

How to Choose the Best Biker Patches for Your Brand? - Verify Colorfastness Against ISO 105-C06 and Abrasion Resistance Standards

Patch Construction Typical Surface ISO 105-C06 Color-Change Target
(Grade 1–5)
ISO 105-C06 Staining Target
(Grade 1–5)
Abrasion Screening Target
(ISO 12947-2)
Recommended Backing Best Use Case Overall Suitability
Embroidered Twill Cotton or polyester twill with raised thread decoration ≥ 4 ≥ 4 ≥ 20,000 cycles Sew-on for maximum durability; iron-on only when the garment allows heat application Classic motorcycle jackets, denim vests and club-style graphics High
Woven Polyester Flat, finely detailed woven fabric with printed or woven artwork ≥ 4 ≥ 4 ≥ 30,000 cycles Sew-on or heat-cut edge; adhesive backing may be used for temporary placement Detailed logos, lettering, technical apparel and repeated washing High
PVC or Rubber Smooth or molded three-dimensional polymer surface ≥ 4 ≥ 4 ≥ 50,000 cycles Sew-on for heavy-duty garments; adhesive or hook-and-loop for removable applications Rain-exposed riding gear, utility jackets and bold dimensional designs Very High
Chenille Thick, soft pile with a textured varsity-style appearance ≥ 3–4 ≥ 3–4 ≥ 15,000 cycles Sew-on; reinforce large patches with a perimeter stitch Decorative back panels, limited-edition pieces and heritage-style garments Moderate
Reflective Textile Reflective film or yarn combined with woven or embroidered fabric ≥ 4 ≥ 4 ≥ 20,000 cycles Sew-on recommended to reduce lifting and edge separation during washing Visibility-focused riding apparel and safety-oriented outerwear High
Testing guidance: ISO 105-C06 evaluates color fastness to domestic or commercial laundering. Ratings use a 1–5 gray-scale system, where 5 indicates the best performance. ISO 12947-2 specifies the Martindale method for determining textile abrasion resistance; the cycle targets shown above are practical screening benchmarks rather than universal pass/fail requirements. Test the finished patch, including its thread, base fabric, coating and backing, under the intended care conditions.

Evaluate Backing, MOQ, Lead Time, and 10–30% Sampling Budgets

When choosing biker patches, inspect the backing before judging the artwork. Sew-on backing suits heavy denim, leather, and repeated washing. Iron-on backing is faster, but heat can damage delicate materials. Hook-and-loop backing offers flexibility for removable designs. Test one patch first. Fabric texture matters.

MOQ can reshape your budget quickly. A low minimum order helps when testing a new emblem or seasonal design. Higher quantities may reduce the unit price, but unused inventory creates hidden costs. Ask for a written quote covering patch size, thread colors, backing, packaging, and setup fees. Do not rely on a casual message.

Lead time deserves equal attention. Request separate dates for artwork approval, sampling, production, and shipping. A realistic schedule prevents rushed quality checks. Reserve 10–30% of your initial patch budget for samples, revisions, and unexpected setup changes. A sample should be checked under daylight, not only on a bright screen. Examine thread density, edge stitching, color contrast, and backing adhesion.

I once underestimated sampling costs and approved a patch too quickly. The border looked clean, but it felt stiff on a curved vest. That mistake taught me to test placement and movement, not just appearance. Keep approval records, measurements, and photos. Small details become expensive later.